Tuesday, April 5, 2011

Not-So-Exciting Garden Update

So... our little garden is barely hanging on, while our neighbors garden is practically bursting at the seams with produce. Here's the lesson: plant your garden in YOUR OWN yard!
Here's some spinach that we planted from seed.
Here are our carrots (planted from seed), growing at a snail's pace.
Broccoli..
And herbs.
I've been intending to plant some tomatoes and a few other things, but based on the difficulty level of walking down the street to our neighbor's house, I don't think it's worth it. I wish there was an easy way to transfer the whole thing into our yard. Oh well. Live and learn... or if you're one of my plants... slowly die and learn.

Sunday, March 27, 2011

New Arrangement

As you will remember... I bought some flowers, and put them in a vase on our mantel in an attempt to make a spring time arrangement. Although I liked a few things about it, I decided that it's just not me.
So then I had to get creative. Thank you for all of your suggestions, because they were the inspiration for my new idea! I spotted these vases in our cabinet and a light bulb went on in my mind.
I went and grabbed a bunch of little green fuzzy ball things out of a vase in my bedroom. I divided them up into the three vases and ta-da!
I also decided to hang the painting instead of leaning it (just for a change-up), and I added two little grasses.
I'm so happy with the way it turned out, and I didn't even have to buy anything.

Monday, March 21, 2011

A Promise is a Promise

True to my word, I am posting some new material today (hooray!). I have been looking for a new rug for our living room for over a year, but I had a couple of criteria. 1. It had to be approximately 9x12 2. It had to be less than $500 and 3. I had to love it. This is why it took a whole year to find this rug!

I liked the rug we had in our living room, but I didn't like the tan on tan on tan color scheme of the room, and I didn't like the large orange stain that we had to keep covered by a piece of furniture.

Here's my before photo. It's pretty old (before our yellow love seat), and pretty messy, but it's the only one I could find of our old rug.
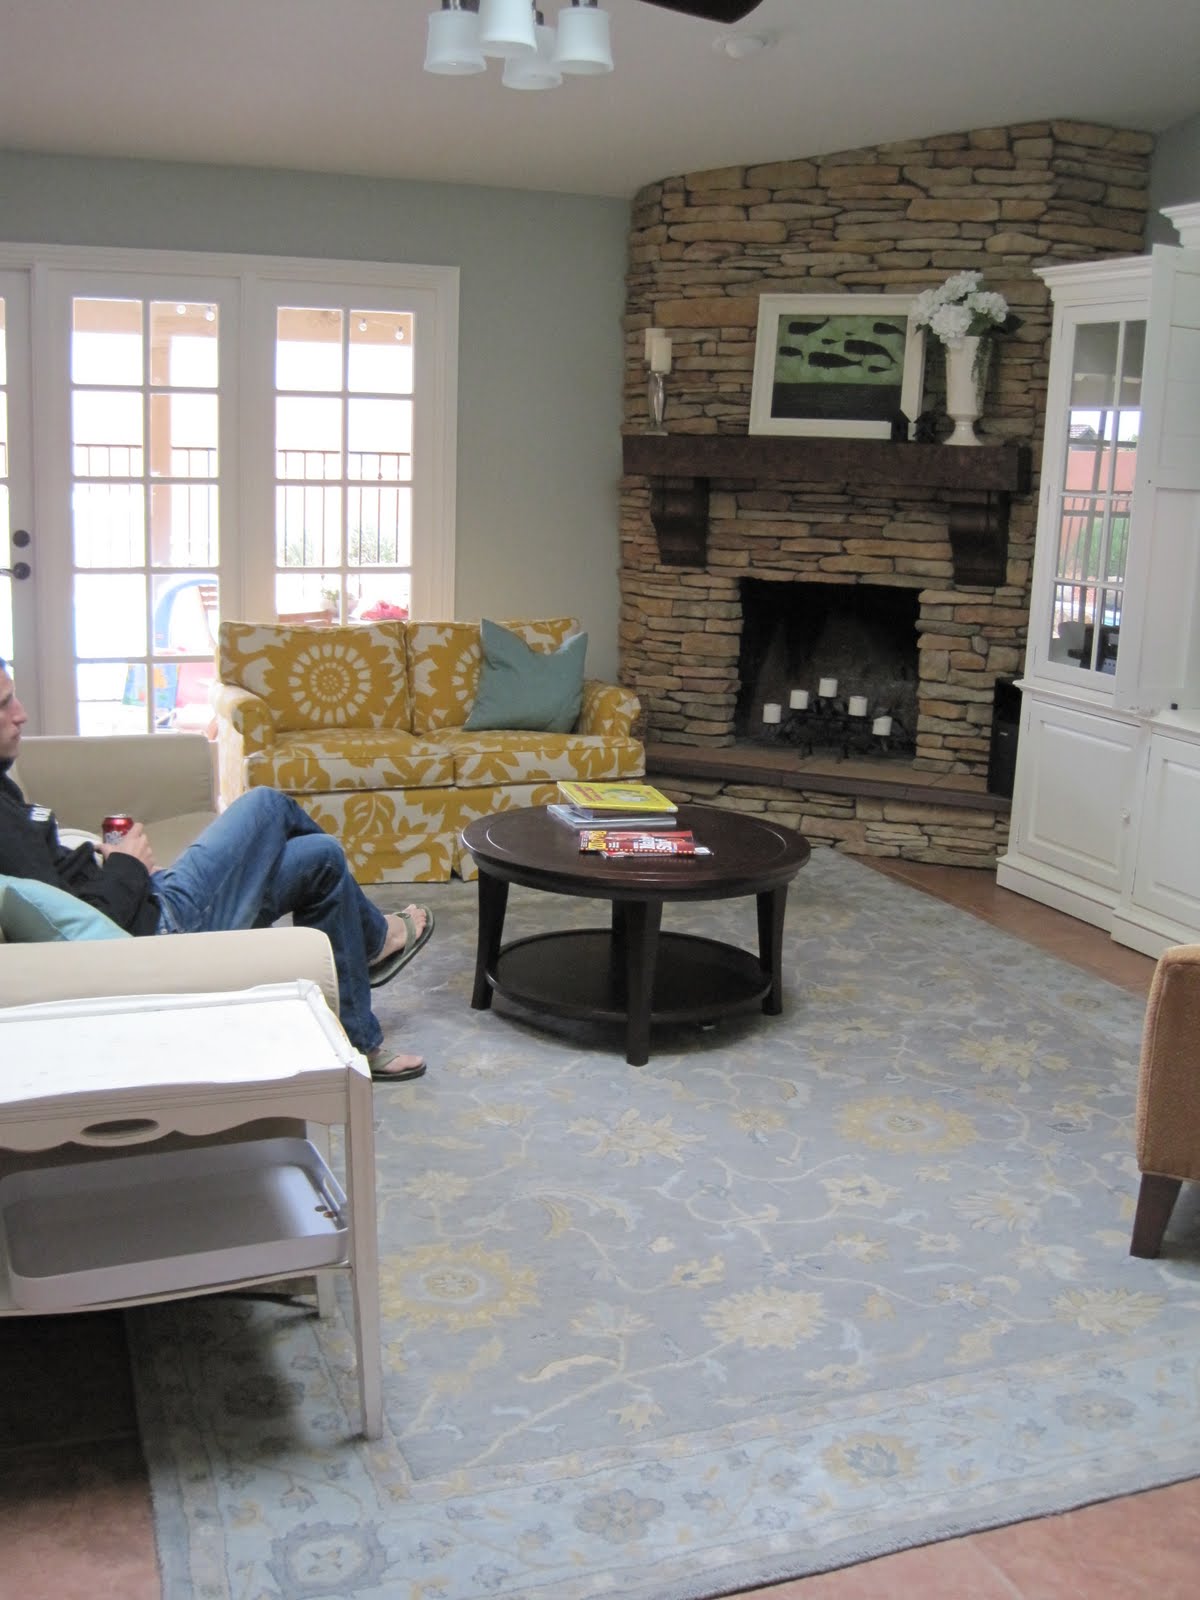
And here's the pretty rug we found (and my husband looking quite comfortable watching Myth Busters)!
We bought it from a store here in town called Furniture Affair. It's a model home furniture outlet, and we LOVE shopping there. The rug is from Pottery Barn, and they sold it to us (in perfect condition) for $330. I couldn't believe it! It was a major score.
It's not as modern as I was picturing, but my more traditional husband loves it, so I didn't even have to talk him into it. And I love it too :). The blue is so soothing.

On a side note, I bought some new flowers at Hobby Lobby to create more of a spring arrangement for the mantel, but I'm pretty sure I'm going to take them back. The modernist in me is rebelling. I'm going to have to find something more funky.

Friday, March 18, 2011

Don't Lose Faith

I have a few things I'd like to post about, but I haven't had the chance. So, here I am using my phone to blog at the airport. Our little garden has been growing slowly but surely, and we also got a new rug for the living room yesterday. I can't wait to show you! We're headed off to Frezno this weekend, but hopefully I'll have a new post ready to go by Monday evening. Stay tuned!

Thursday, March 10, 2011

WASH

I had this bright idea to buy a whole bunch of cardboard letters to put up above the sink. I wanted them to say "eat, wash, repeat." Wouldn't that have been cute and clever? I thought it would at least be better than the Van Gogh print that we had up there (which I like, but is a little boring).
Unfortunately, when I got all the letters home, they were way bigger than I anticipated. So, after I painted them with black chalkboard paint, I decided to only hang the word "wash."
But it still didn't look quite right. It was way too stark, and felt a bit out of place. So THEN I thought that it would be cute and fun and spring-y to glue some floral fabric to the letters, and look! I love it!
I love how the fabric ties in with the mirror color (don't mind Dave... he just happened to be in my shot :).
And here's a close-up only because I really love this fun fabric and I want you to get a good look at it.
These cardboard letters are $3 apeice at Joanne, so go get creative!

Wednesday, March 2, 2011

Music Video

Dave and I spent pretty much all of Monday shooting our new music video. It was so exhausting, but so much fun! Bradley Gregg was the director, and his wife, Dawn shot these awesome photos (in addition to helping us with the storyline, costumes, models, etc.). She's basically really great.

Here I am in Dawn's hat (which I didn't end up wearing on-camera), hanging out with baby Heller #2.


There were some really funny moments.


And there were times to be serious.

We had such a wonderful crew.
AND the location was fantastic! We shot it at Modern Manor in downtown Phoenix.
The furniture and decorations there really made our video unique and beautiful. What an enormous blessing!
All of the the footage is complete, but now we enter the editing process where it all gets pieced together. We've seen the Lord working through every step of the process, and we pray that He continues to lead and inspire us to create something wonderful that brings glory to His name.

Sunday, February 27, 2011

Growing Garden

Overall, things seem to be going well in the garden. I haven't been the most consistent waterer, so I'm actually impressed to see that things are still alive!

My cilantro looks a little sad (I'm thinking because of the lack of water), but the red leaf lettuce (in the background) and the thyme seem to be doing just fine. After the big frost, the nasturtium died, but everything else is still green and growing.
And look! The spinach is sprouting! Did you notice my little plant markers? I made them out of aluminum roof tiles.
And the carrots...
And the yellow onion!
I still have to go out and buy some tomatoes, peppers, squash, basil and zucchini.

Thursday, February 17, 2011

Pretty Easy Bracelet

Yesterday my friend Lindsey showed me how to make a really easy leather bracelet. She bought an awesome one at a boutique, and then realized that she could make them on her own! So... she brought her supplies and shared them (along with her crafting wisdom) with us lucky ladies.
Look at all of these beautiful leather scraps!
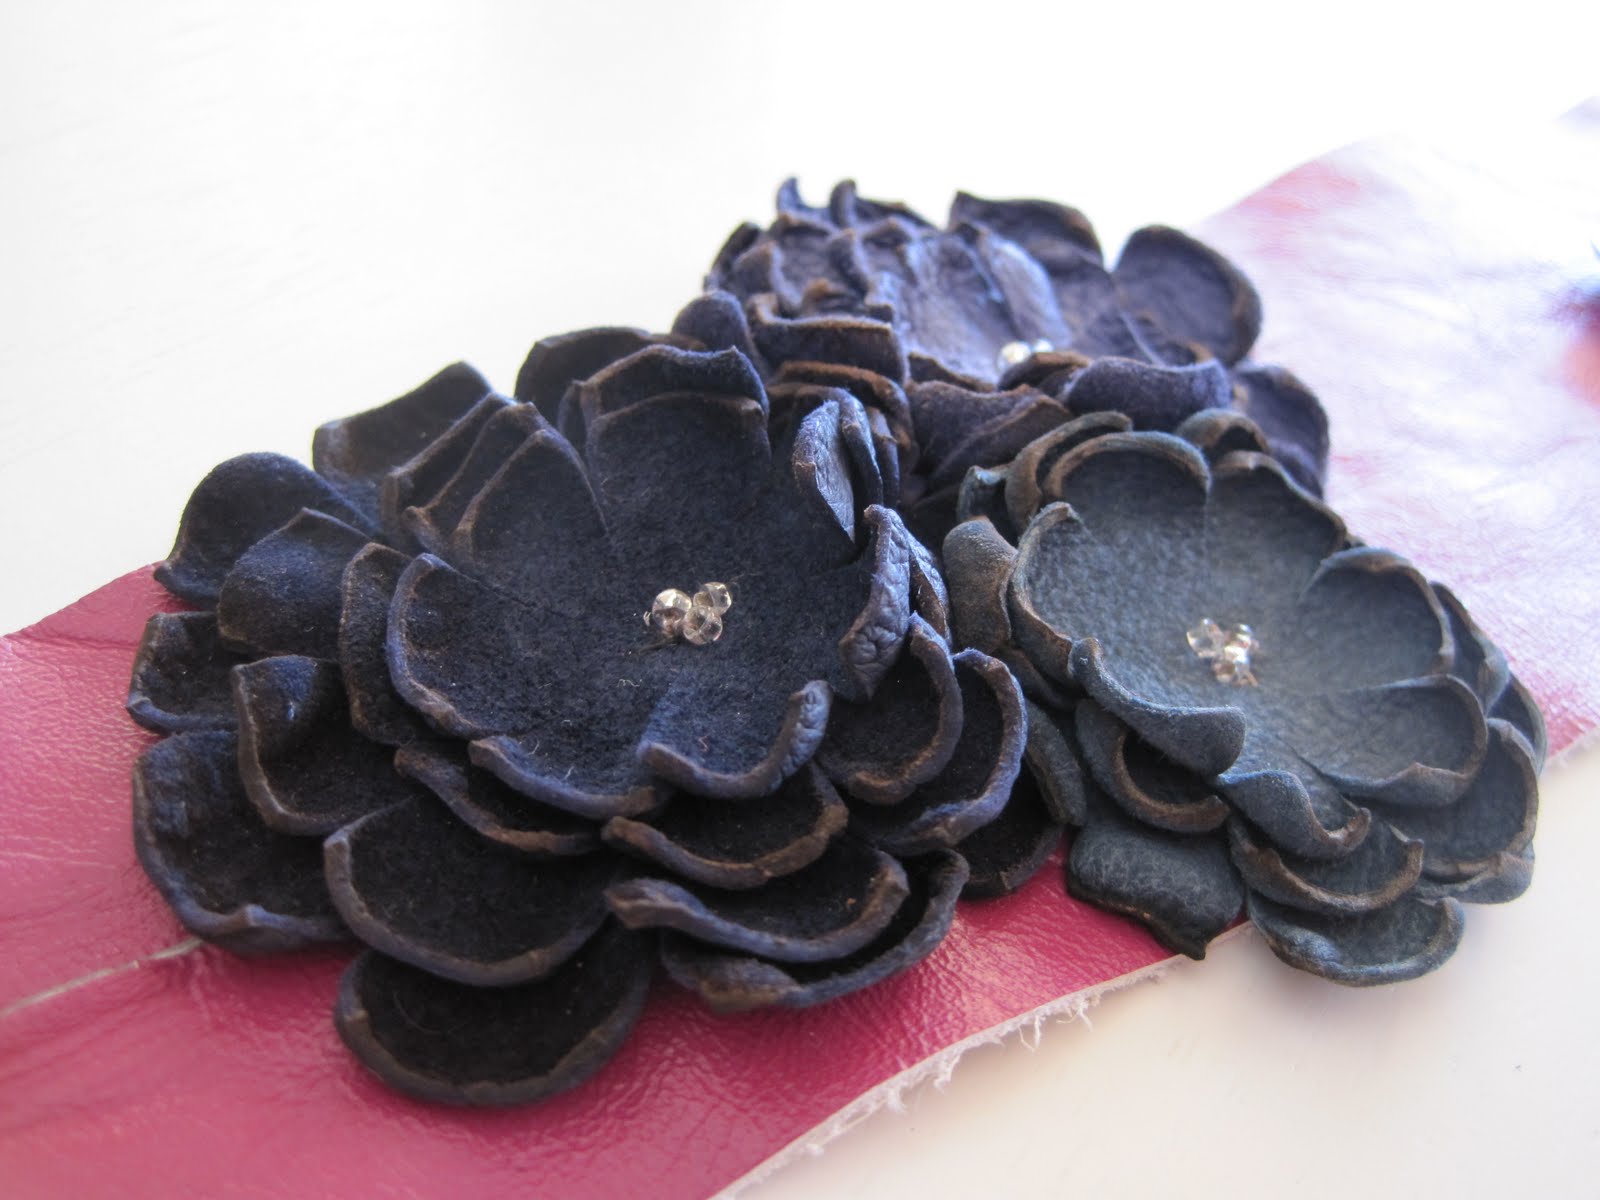
First I cut out the base shape of the bracelet out of a thicker leather, then I cut little circles for the flower layers out of the thinner, softer leather. I snipped some slits around the perimeter of each circle, then held them over a flame from a candle for a second or two until they started to curl. Isn't it amazing that a little fire can do that? I guess this would be a good time to tell you to be careful, and also that it's not a good idea to do this craft with little ones.
Then I layered three or four petal circles on top of each other, chose their placement, and hand-sewed them on. A thimble is a handy tool for this step. I also sewed a few seed beads in the center for a little extra sparkle. Then, I cut the slit for the button hole (notice that mine is a little crooked :), sewed on the button, and voila!
Cute, one-of-a-kind leather bracelet!
The great thing about this project is that you don't even have to break out the sewing machine! No finished edges needed.
Fun, right? Now you just have to go out and try to find a place that sells leather scraps. If you live in Phoenix, they sell them at SAS Fabrics on Indian School.. just don't clean them out before I get there!

Friday, February 11, 2011

More Birds

I'm sorry. I just can't help myself. More birds. In fact, I just bought a whole book of birds to cut up and use for craft projects.

So, these are my supplies...
Here's an example of a page in this AWESOME book!
And here's my little craft project :). I still have to glue it all together, but I thought it would be fun to post, even if it's not finished yet.
I have a TON more supplies, and I'm excited to make more of these little guys. I think I might use my little letter stamps to spell out some words and phrases next time around.

Monday, February 7, 2011

Kind-of Homemade Margherita Pizza

First of all, I must apologize that I don't have a photo for this one. BUT, I figured this recipe was worth sharing. Also, I don't have the exact measurements for things, so you'll have to use your own discretion.

Ingredients:
1 pack of fresh pizza dough (I love the kind from Fresh & Easy)
3 Tbs(?) Olive Oil
2 cloves minced garlic
mozzarella cheese
2 Tbs(?) romano or parmesan cheese
2 sliced tomatoes
fresh basil cut coarsely chopped
*chicken apple sausage from Fresh and Easy is awesome too!

Pre-heat your oven to 450.
1. Put some flour down and roll out your dough.
2. Put olive oil in a pan and saute garlic until just turning golden.
3. Use pastry brush (or whatever you got!) to spread olive oil over the crust.
4. sprinkle with just a tiny bit of sea salt if you want to.
5. Add the delicious cheeses and tomato and sausage (if you want).. but don't add the basil just yet.
6. You can add a bit more cheese on top of your toppings if you'd like
7. put it in the oven for 10 minutes or so.
8. When it looks almost done, pull it out and add the fresh basil.
9. Put it back in the oven, and take it out when the cheese is nice and bubbly, and the bottom starts to get a little bit golden.

Let me know if you try it out. This one has been a big hit around my house!