Today was Lucy's third birthday, and I REALLY wanted to make a rainbow cake for her because I've seen so many seriously cute pictures of them online. The problem is, I don't know much about baking and/or cake decorating. Fortunately for me, my neighbor, Christine is great at it! She volunteered to help me make the toddler cake of my dreams (ok... so she basically did the whole thing, but I learned a whole lot watching her!).
First, she mixed one white box cake mix according the directions (you can certainly make it from scratch, but it saves a ton of time using a box mix), then weighed it and divided it by six. Using that number, she weighed out six equal portions of batter for the six layers, then put them into six bowls. Then we used gel dyes (not food coloring) to make the colors really saturated.
She baked each layer for nine minutes, then let them cool and started stacking them up with a layer of frosting in between.
I thought it would be really pretty and fun to put dum dums on the cake since Lucy is a big fan of lollipops. Christine had the idea to make a border all the way around the bottom, and I thought it would look pretty to do a graduated color pattern. We left the sticks attached to the dum dums and just pushed them into the cake. Isn't it pretty?Here's the top view: Look how excited she is!Ta Da!It was SUPER sugary, but we made quite a dent in it.
Showing posts with label tutorials. Show all posts
Tuesday, December 6, 2011
Thursday, February 17, 2011
Pretty Easy Bracelet
Yesterday my friend Lindsey showed me how to make a really easy leather bracelet. She bought an awesome one at a boutique, and then realized that she could make them on her own! So... she brought her supplies and shared them (along with her crafting wisdom) with us lucky ladies.
Look at all of these beautiful leather scraps!
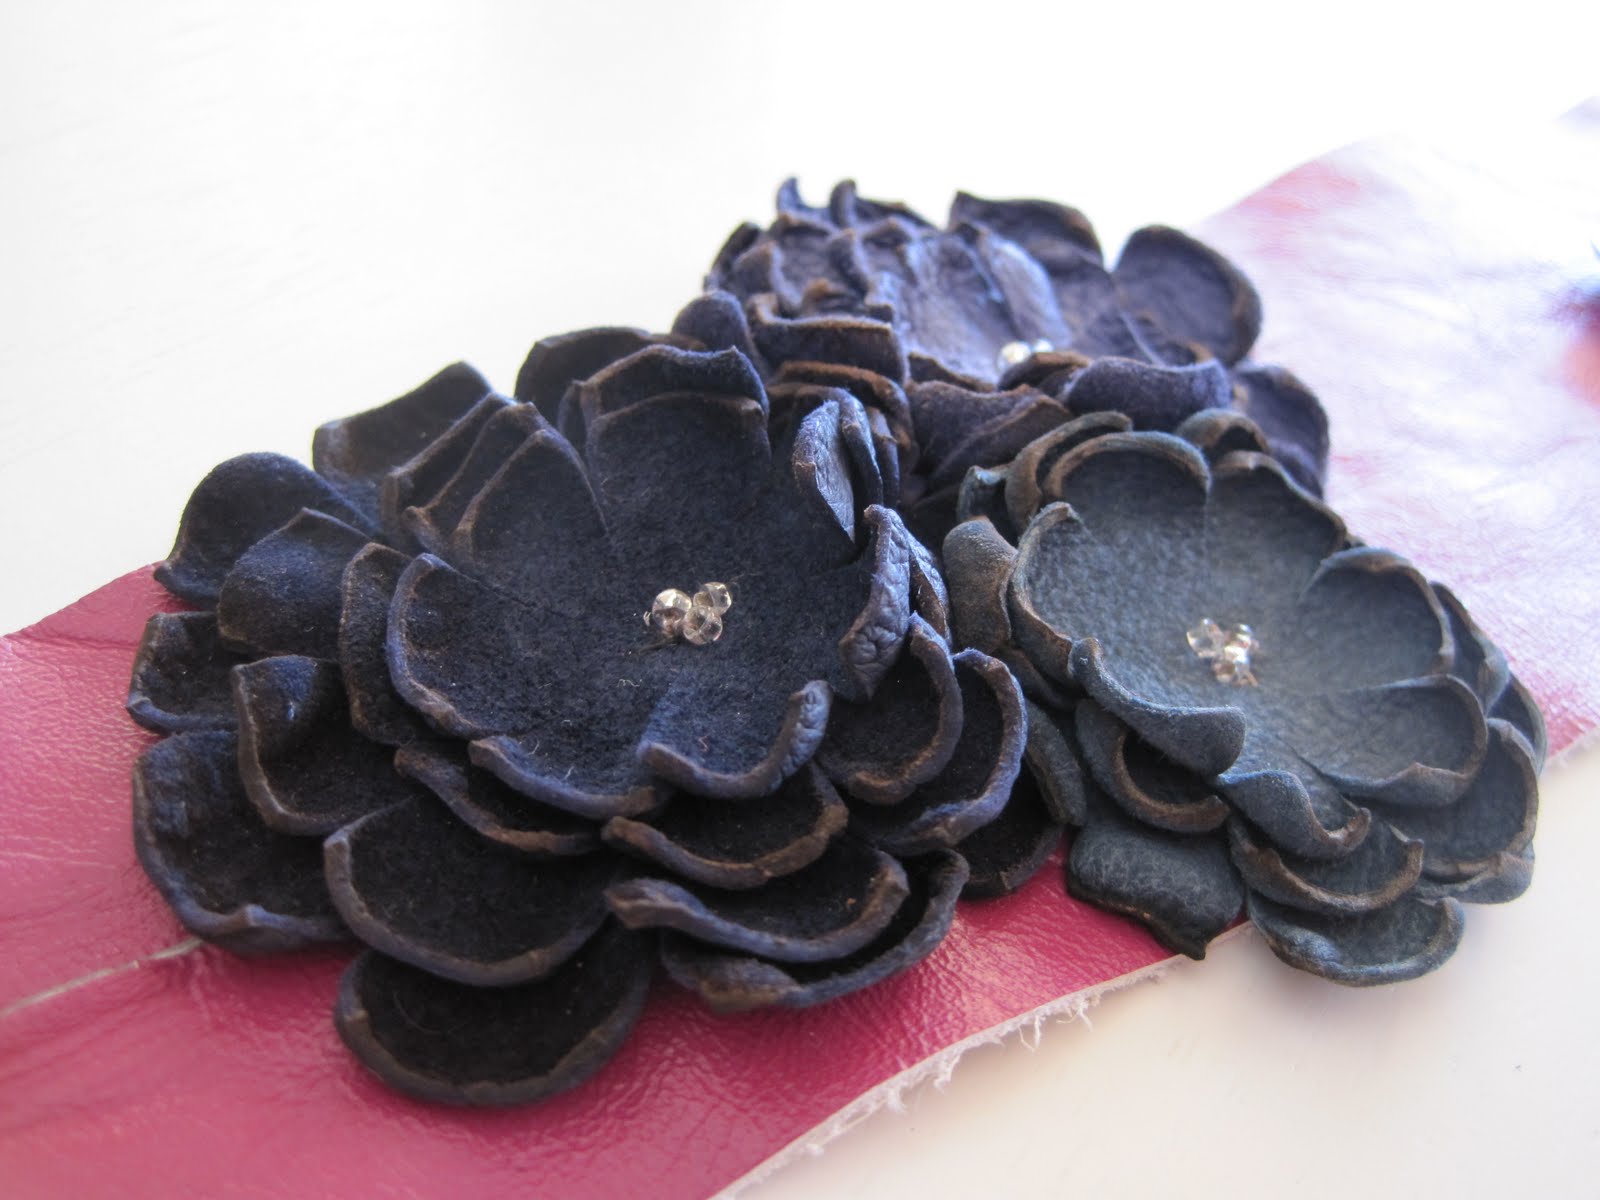
First I cut out the base shape of the bracelet out of a thicker leather, then I cut little circles for the flower layers out of the thinner, softer leather. I snipped some slits around the perimeter of each circle, then held them over a flame from a candle for a second or two until they started to curl. Isn't it amazing that a little fire can do that? I guess this would be a good time to tell you to be careful, and also that it's not a good idea to do this craft with little ones.
Then I layered three or four petal circles on top of each other, chose their placement, and hand-sewed them on. A thimble is a handy tool for this step. I also sewed a few seed beads in the center for a little extra sparkle. Then, I cut the slit for the button hole (notice that mine is a little crooked :), sewed on the button, and voila!
Cute, one-of-a-kind leather bracelet!
The great thing about this project is that you don't even have to break out the sewing machine! No finished edges needed.
Fun, right? Now you just have to go out and try to find a place that sells leather scraps. If you live in Phoenix, they sell them at SAS Fabrics on Indian School.. just don't clean them out before I get there!
Look at all of these beautiful leather scraps!
First I cut out the base shape of the bracelet out of a thicker leather, then I cut little circles for the flower layers out of the thinner, softer leather. I snipped some slits around the perimeter of each circle, then held them over a flame from a candle for a second or two until they started to curl. Isn't it amazing that a little fire can do that? I guess this would be a good time to tell you to be careful, and also that it's not a good idea to do this craft with little ones.
Then I layered three or four petal circles on top of each other, chose their placement, and hand-sewed them on. A thimble is a handy tool for this step. I also sewed a few seed beads in the center for a little extra sparkle. Then, I cut the slit for the button hole (notice that mine is a little crooked :), sewed on the button, and voila!
Cute, one-of-a-kind leather bracelet!
The great thing about this project is that you don't even have to break out the sewing machine! No finished edges needed.
Fun, right? Now you just have to go out and try to find a place that sells leather scraps. If you live in Phoenix, they sell them at SAS Fabrics on Indian School.. just don't clean them out before I get there!
Monday, February 7, 2011
Kind-of Homemade Margherita Pizza
First of all, I must apologize that I don't have a photo for this one. BUT, I figured this recipe was worth sharing. Also, I don't have the exact measurements for things, so you'll have to use your own discretion.
Ingredients:
1 pack of fresh pizza dough (I love the kind from Fresh & Easy)
3 Tbs(?) Olive Oil
2 cloves minced garlic
mozzarella cheese
2 Tbs(?) romano or parmesan cheese
2 sliced tomatoes
fresh basil cut coarsely chopped
*chicken apple sausage from Fresh and Easy is awesome too!
Pre-heat your oven to 450.
1. Put some flour down and roll out your dough.
2. Put olive oil in a pan and saute garlic until just turning golden.
3. Use pastry brush (or whatever you got!) to spread olive oil over the crust.
4. sprinkle with just a tiny bit of sea salt if you want to.
5. Add the delicious cheeses and tomato and sausage (if you want).. but don't add the basil just yet.
6. You can add a bit more cheese on top of your toppings if you'd like
7. put it in the oven for 10 minutes or so.
8. When it looks almost done, pull it out and add the fresh basil.
9. Put it back in the oven, and take it out when the cheese is nice and bubbly, and the bottom starts to get a little bit golden.
Let me know if you try it out. This one has been a big hit around my house!
Ingredients:
1 pack of fresh pizza dough (I love the kind from Fresh & Easy)
3 Tbs(?) Olive Oil
2 cloves minced garlic
mozzarella cheese
2 Tbs(?) romano or parmesan cheese
2 sliced tomatoes
fresh basil cut coarsely chopped
*chicken apple sausage from Fresh and Easy is awesome too!
Pre-heat your oven to 450.
1. Put some flour down and roll out your dough.
2. Put olive oil in a pan and saute garlic until just turning golden.
3. Use pastry brush (or whatever you got!) to spread olive oil over the crust.
4. sprinkle with just a tiny bit of sea salt if you want to.
5. Add the delicious cheeses and tomato and sausage (if you want).. but don't add the basil just yet.
6. You can add a bit more cheese on top of your toppings if you'd like
7. put it in the oven for 10 minutes or so.
8. When it looks almost done, pull it out and add the fresh basil.
9. Put it back in the oven, and take it out when the cheese is nice and bubbly, and the bottom starts to get a little bit golden.
Let me know if you try it out. This one has been a big hit around my house!
Friday, January 28, 2011
So Pretty
Look at this fantastic project
I ran across today! I just thought I'd share the genius. This brooch would make a great Valentine's Day gift.
Monday, October 18, 2010
Racer-Back Dress
I made this little yellow dress for Lucy a while ago, but I had a hard time getting my act together to grab my camera while she was wearing it. It's been great during the hot hot summer here in Phoenix. I just love making these little t-shirt dresses! I first got the idea from this tutorial.
I used the ruffle effect like I've done before, and I love the way that the vertical lines look against the horizontal stripes. By the way... this is the very first time Lucy has ever "smiled" for the camera. Basically, it's her first fake smile :). Doesn't she look so grown-up?

Here's the fun little racer back.

Ruffles are so easy and make such an impact! I love it.

If you have a little girl in your life, you should totally make her one of these! They take less than an hour and are so super cute.
I used the ruffle effect like I've done before, and I love the way that the vertical lines look against the horizontal stripes. By the way... this is the very first time Lucy has ever "smiled" for the camera. Basically, it's her first fake smile :). Doesn't she look so grown-up?
Here's the fun little racer back.
Ruffles are so easy and make such an impact! I love it.
If you have a little girl in your life, you should totally make her one of these! They take less than an hour and are so super cute.
Friday, September 3, 2010
Jeans
Since I haven't been home recently to do anything crafty, I decided to post more tutorials that I've run across recently. Check out this one about how to take in the waist of your jeans. Love it!

I've added Freshly Picked to my blogroll. I just found it, and I just love it!

I've added Freshly Picked to my blogroll. I just found it, and I just love it!
Subscribe to:
Posts (Atom)